Insulation Installation: What to Expect
Thinking about upgrading your home’s insulation but unsure of the process? You’re not alone. Many homeowners search for information on insulation installation but aren’t sure what the job actually involves. The good news? The process is more straightforward—and more rewarding—than you might think.
Whether you’re insulating an attic, walls, crawlspace, or the entire house, this guide will walk you through each stage of the process, helping you prepare and get the most value from your investment.
Why Proper Insulation Installation Matters
Insulation is one of the most impactful upgrades you can make for your home’s energy efficiency. But even the best insulation materials won’t perform well if they’re poorly installed. Gaps, compression, or inadequate sealing can drastically reduce the effectiveness of insulation.
When done right, insulation installation improves indoor comfort, reduces energy bills, dampens noise, and increases your home’s resale value. According to Energy Star, sealing air leaks and adding insulation can save homeowners up to 20% on heating and cooling costs.
Step 1: What Happens Before Installation
The first step in any insulation project is the evaluation. Here’s what to expect:
- Home Inspection: A professional will assess your existing insulation levels, check for air leaks, and identify areas that need improvement.
- R-Value Recommendations: They’ll suggest the appropriate R-value for your home’s climate zone and specific project (attic, walls, floors, etc.).
- Proposal and Quote: You’ll receive a detailed estimate, including the type of insulation, thickness, cost, timeline, and prep work involved.
- Scheduling: Once you approve the quote, the job will be scheduled—usually within a few days to a couple of weeks, depending on the season.
At this stage, your contractor should answer any questions you have and explain how to prepare your home. For attic work, this might include clearing stored items or securing pets for safety.
Step 2: The Day of the Installation
On the day of the job, the insulation installation team will arrive with materials and equipment. Depending on the insulation type—batt, blown-in, or spray foam—the process will vary slightly.
Here’s a general breakdown:
- Prep Work: Drop cloths or plastic sheeting may be used to protect your home. Old insulation might be removed if it’s wet, moldy, or underperforming.
- Air Sealing: Professionals often seal cracks and penetrations with caulk or foam before installing insulation to maximize efficiency.
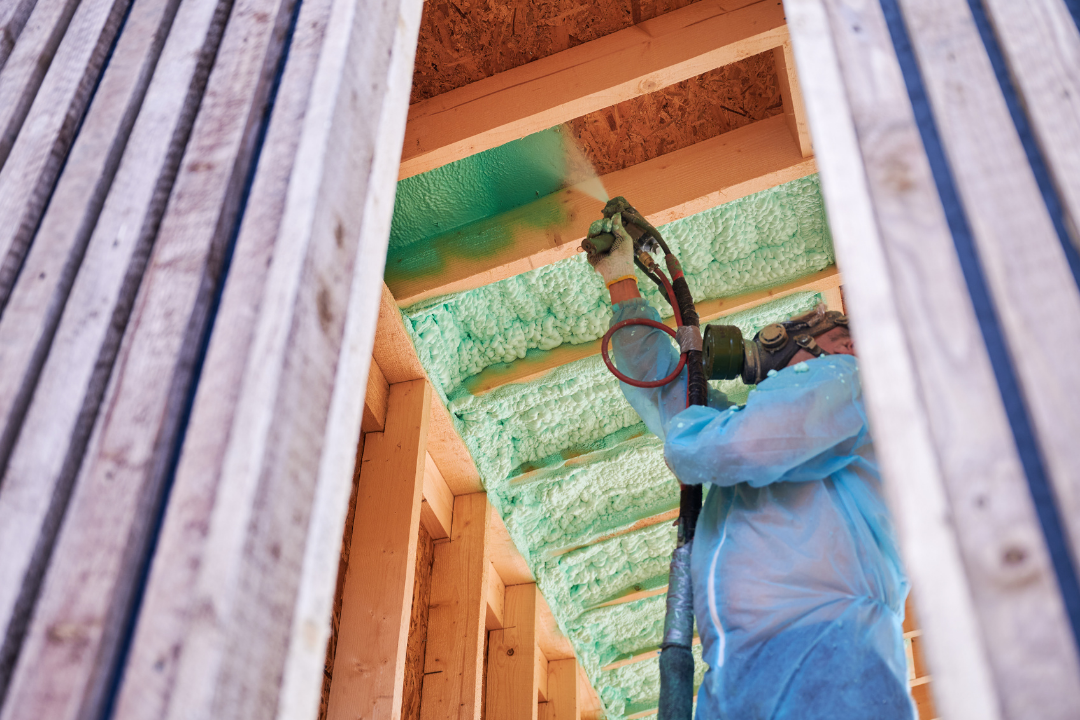
- Insulation Application: The material is installed based on your specific needs. Spray foam expands to fill gaps, while batts are cut and placed between framing.
- Cleanup: After installation, the team will remove debris, seal any access points, and ensure your home is clean and safe.
Most projects take less than a day, though larger homes or multiple areas might need more time.
Step 3: After the Work Is Done
Once the insulation installation is complete, you’ll immediately notice a difference—especially if your home was previously under-insulated.
Here’s what to expect:
- Improved Comfort: Rooms feel warmer in the winter and cooler in the summer, with fewer drafts or temperature swings.
- Quieter Spaces: Insulation adds soundproofing, making your home more peaceful.
- Lower Energy Bills: You should begin to see savings on your utility bills within the first month or two.
- Documentation: Your installer may provide R-value verification and documentation that could qualify you for rebates or energy incentives.
If you notice any lingering odors (from spray foam, for example), they typically disappear within a day or two. Your installer may also follow up to ensure you’re satisfied with the results.
Choosing the Right Insulation Installer
The quality of your insulation installation depends heavily on the team doing the work. When selecting a contractor, look for:
- Proper licensing and insurance
- Experience with the specific insulation type you need
- Positive reviews and customer references
- Clear communication and transparent pricing
You should feel confident that your contractor understands your goals and is committed to delivering a high-performance, code-compliant installation.
Common Mistakes to Avoid
Even with professional help, it’s smart to know the pitfalls to avoid:
- Skipping air sealing before insulation is added
- Using the wrong R-value for your climate
- Insulating without addressing moisture issues
- Layering incompatible materials, which can trap moisture or reduce effectiveness
Ask your contractor how they handle these issues to ensure a job done right the first time.
Timing Your Insulation Project
You can schedule insulation installation any time of year, but spring and fall are ideal. These seasons allow you to prepare your home before extreme heat or cold hits—and contractors may have more flexible scheduling options.
Additionally, local utility companies sometimes offer seasonal rebates, so check for promotions that could lower your out-of-pocket cost.
Ready to Insulate With Confidence?
Knowing what to expect makes any home upgrade easier—and insulation is no exception. From initial inspection to final cleanup, a quality insulation installation improves your comfort, energy savings, and home value.
If you’re ready to make your home more efficient, don’t wait for another high energy bill to hit. Reach out to a trusted local installer today and take the first step toward a cozier, more cost-effective home.
